Page Scale
In all modes, other than Original, priPrinter
fits the Source page into the Destination page by scaling.
 The idea is very simple
- priPrinter fits the work area of the source page into the work area of
the destination
page. In the case of multiple pages it
fits each page into a cell of a virtual grid.
The idea is very simple
- priPrinter fits the work area of the source page into the work area of
the destination
page. In the case of multiple pages it
fits each page into a cell of a virtual grid.
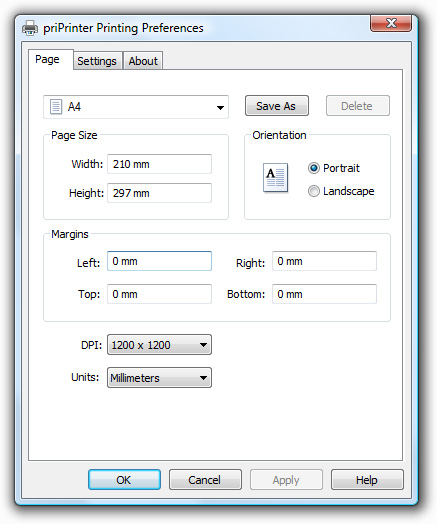
The work area of the source pages is defined by margins set up in the
priPrinter
Configuration dialog. By default these values are set to 0. It means that
the whole page is available for printing.
 However it may be a little confusing at
first.
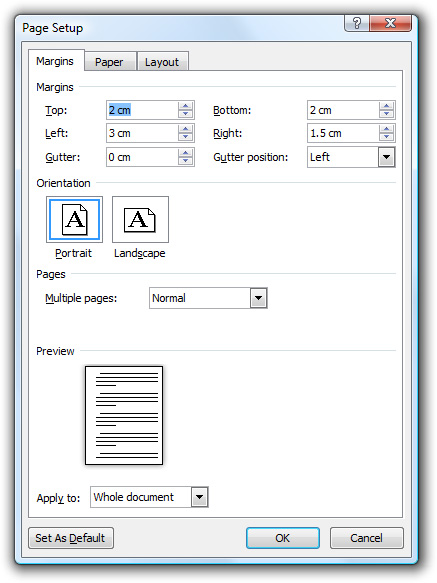
For example MS Word has its own
Page Setup dialog with its own margins. These margins are not passed to the printer and can't
be detected with 100% accuracy - priPrinter still thinks that the page
margins are 0. You can fix this in two ways:
However it may be a little confusing at
first.
For example MS Word has its own
Page Setup dialog with its own margins. These margins are not passed to the printer and can't
be detected with 100% accuracy - priPrinter still thinks that the page
margins are 0. You can fix this in two ways:
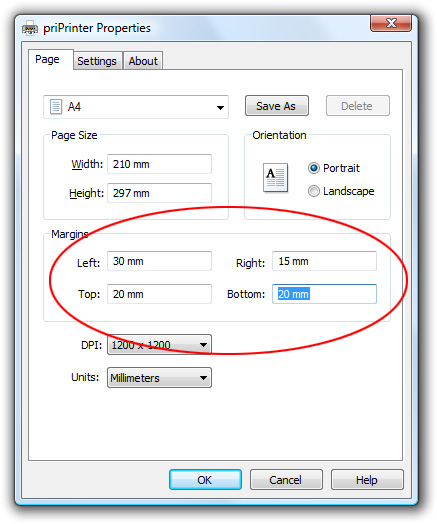
1. Open
priPrinter Configuration Dialog
and specify
the same
margins as in MS Word. After printing to priPrinter you
will be able to see these margins in the page tooltip. Red
rectangle displays the area visible in the print preview area.
2. It's possible to autocrop pages.
This option is ON by default.
3. You may crop pages with priPrinter - manually or via
a theme.
The rest of this tutorial explains how
scaling works in different
layouts.
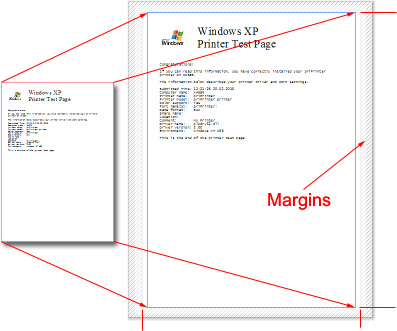
b) One page Layout
In this mode priPrinter inserts the work area of
the source page into the work area of
physical printer. Because of that, the page can be printed with some
offset and rescaling. When the source area is large, it scales down in
order to fit the smaller work area of the physical page. When the source
area is smaller, it scales up. Usually some rescaling is used by
priPrinter to achieve the best fit onto the actual sheet of paper being
printed. You can examine the rescaling amount by resting your mouse
pointer in the margin of the priPrinter preview page and reading the
tooltip. Also, you can specify an exact value in the Page Scale Dialog.
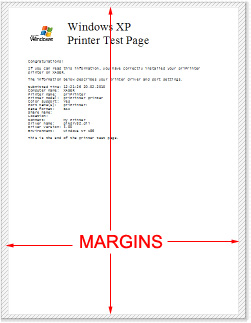
For example 100% means that page will be printed exactly as is. In this
case, if your printer has some hardware limits some clipping may occur.
You can't change physical margins - it's a hardware
limitation, however you can define logical margins. So
priPrinter will insert the page into a new work area. Please see
image below.
Let's see what we can do when you are unhappy with the page scale factor. In
the diagram above, the work area of the source page is projected into the work
area of the paper sheet. Using the default setting, when the size of the source
page is equal to the size of the paper sheet, pages will be scaled down. It
happens because of different priPrinter and physical printer margins. It can be
corrected in different ways:
1. Specifying the same borders as in your physical
printer.
2. Locking page scale factor to 100%
3. Defining zero size margins for physical printer.
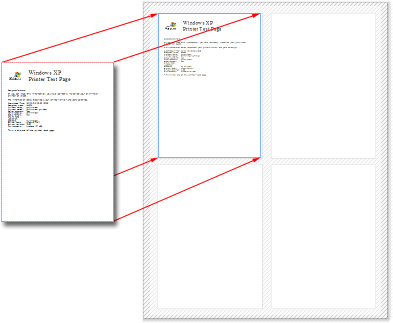
c) N x N Layout
Everything works almost in the same way as in the
previous case. The difference is – each page is inserted into a virtual
table grid. The size of each cell depends on the number of virtual
pages on to each physical sheet, margins and separators. Margins
and separators are editable using the mouse, or you can open the page
layout dialog and type in the exact values you want to use.
If you need to scale to a different size, you may reduce the margins or
separators, or you can crop the source pages or specify custom scaling.
d) Booklet
Again, it works in the same way as with one page or N x N Layouts, however
with booklets the gutter is taken into account. The gutter can be horizontal or
vertical. It can be zero sized or you can drag it to any amount you wish. The
first page of your job can be used as the cover page if you wish. You are free
to change this choice in Booklet options.
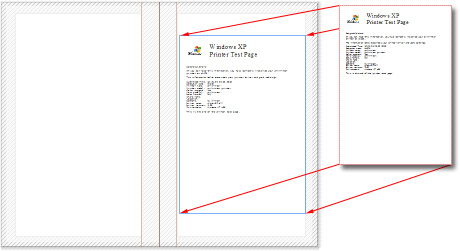
Each booklet virtual page may have one physical page or
you can subdivide it in the same way as in N x N layout.
Gutters
Using gutters in single sided mode is very similar to
extending the margin. However in double sided mode gutters
instruct priPrinter how to print the back side of the paper
sheet. You may change the gutter from left to top and the
back side will be changed in order to reflect the changed
layout.
In booklet mode possible options for gutter are: Vertical or
Horizontal.
Comments
* Basically a hardware printer can't print very close to the edge of the page
just because ink or toner can pollute or hurt the printer mechanism.
** Of course you may try to specify another paper size
and force the printer to print in the unprintable hardware margins but it's kind
of tricky. We recommend that you don’t do this as it may cause damage to your
printer.
*** There are some models on the market which can print
without borders. This is borderless mode. In most cases
there is a downside. The speed may be slow, or duplex mode may be not available.
All tutorials
