How to print an email
This tutorial describes how to manually combine pages and fit text to one page.
This tutorial describes how to manually combine pages and fit text to one page.
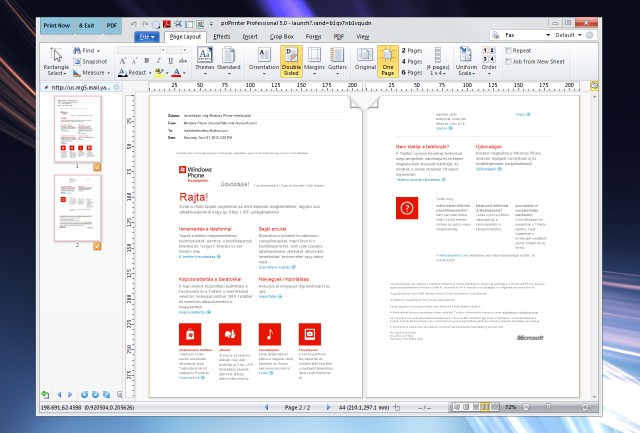
Let's say we have an email* to print. By default this email will be printed on the two pages. See image below.
Of course, it is possible to use 2UP layout, but we will try to fit everything onto one sheet of paper in more friendly format, i.e. without reducing text and graphics. Shortly we should remove not required parts, like email headers or footers and shrink everything into one page by removing white areas.
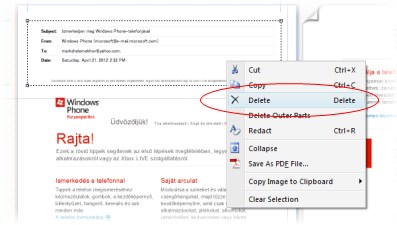
Firstly we should remove email header and footer. See marked areas below. We can see header. It is a standard email header with fields: From, To, Subject. Second area is footer with some sort of official information, trademarks, etc. We don't want to print it.
Removing can be done quite easy with help of Rectangle Select tool. Hence, in Rectangle select mode, we should select email header by mouse. There is no need to draw exact rectangle. Rectangle can be adjusted later by dragging it's borders. After that, right click on the selected area. Popup menu will appear, select "Delete" or press Delete key.
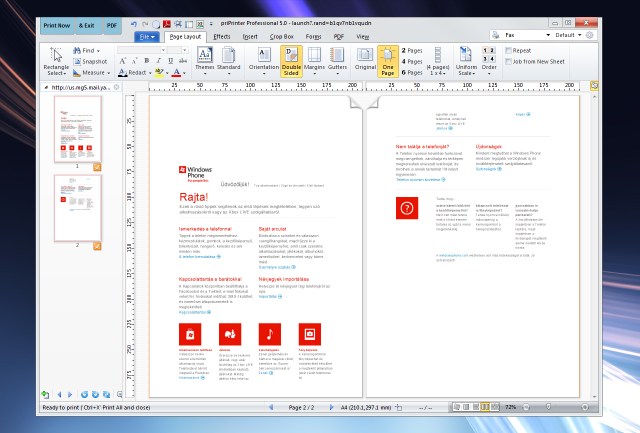
In the same way we may remove text in the end of email. See image below. All unnecessary parts are removed.
 After
that our document has few empty parts, however it still occupies two pages. We
should combine these two pages into one. It's possible to copy parts
from second page to the first one. Fortunately, there is a simpler solution.
We can use "Combine" command. This command joins two or more pages into one
long page.
After
that our document has few empty parts, however it still occupies two pages. We
should combine these two pages into one. It's possible to copy parts
from second page to the first one. Fortunately, there is a simpler solution.
We can use "Combine" command. This command joins two or more pages into one
long page.
Let's try use this way. You have to select two pages. For example you can do it by mouse clicking
on the pages in the left window. Next, select Combine Pages command in
the right click menu. 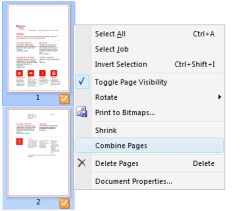
In a few moments pages will be combined into one, long page. See results:
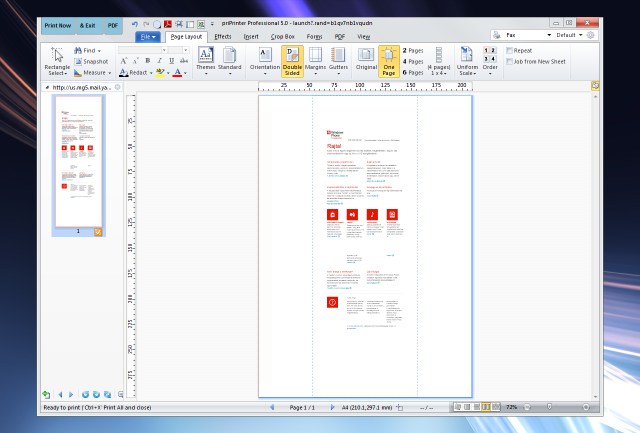
Now we've got one very long page with many blank areas. Thanks to new priPrinter features it is possible to shrink page by collapsing white areas. Again, right click on page and click on "Shrink".
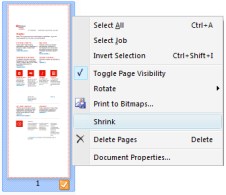
priPrinter will analyze page for just a second or even less and collapse all white areas. See results:
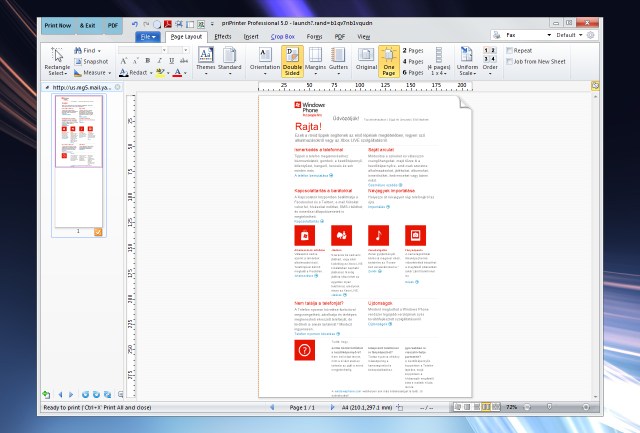
That's it. Final page has almost same scale factor as original ones. We can go even further and adjust internal text paragraphs. It can be done with selecting areas and moving them with mouse or with Cut/Copy/Paste commands.
There is no special order of operations in this workflow. For instance, you may want to combine pages in the first step and delete not required text one by one.
* Printing of Email , which we described here,
is used only in example purposes.
Several features described here are parts of
priPrinter Professional